
Embarking on a new adventure should be exciting, not stressful. In today’s hyper-connected world, one of the biggest travel anxieties often revolves around staying online. Will my phone work? Will roaming charges break the bank? This is where the magic of an eSIM comes in, and at Tripcel, we believe getting connected should be as simple as packing your bags.
Gone are the days of fumbling with tiny SIM cards, searching for local stores, or deciphering confusing data plans. Tripcel eSIMs offer instant, digital connectivity, but we understand that anything “new” can sometimes feel daunting. Don’t worry! We’re here to walk you through the simplest tricks to install your eSIM with absolutely no stress, ensuring you’re online and exploring the moment you land.

Why Tripcel eSIM is Your Easiest Connectivity Choice
Before we dive into the steps, let’s quickly touch on why Tripcel eSIM is designed for ultimate ease:
- No Physical Card: It’s a digital SIM. No swapping, no losing, no pin tools needed.
- Instant Activation: Purchase online, install, and activate in minutes, often before you even leave home.
- Global Coverage: Seamlessly switch between destinations without changing cards.
- Newly Upgraded Direct Install: Our latest update makes installation unbelievably simple, often requiring just one device!
Ready to unlock this simplicity? Let’s get your Tripcel eSIM installed effortlessly.
The Super Simple Steps to Install Your eSIM
We’ve streamlined the process to ensure you’re online with minimal effort.
What You’ll Need:
- A Tripcel eSIM compatible device (most newer smartphones support eSIM).
- Stable Wi-Fi connection during installation (your home Wi-Fi is perfect).
- Your Tripcel eSIM QR code (sent to your email after purchase).


Method 1: Direct Install from Email (Super Easy – No Second Phone Needed!)
This is the ultimate hassle-free option, exclusive to Tripcel’s upgraded eSIM experience.
- Open Your Tripcel eSIM Email: On your smartphone (the one you’re installing the eSIM on), open the email from Tripcel that contains your eSIM QR code.
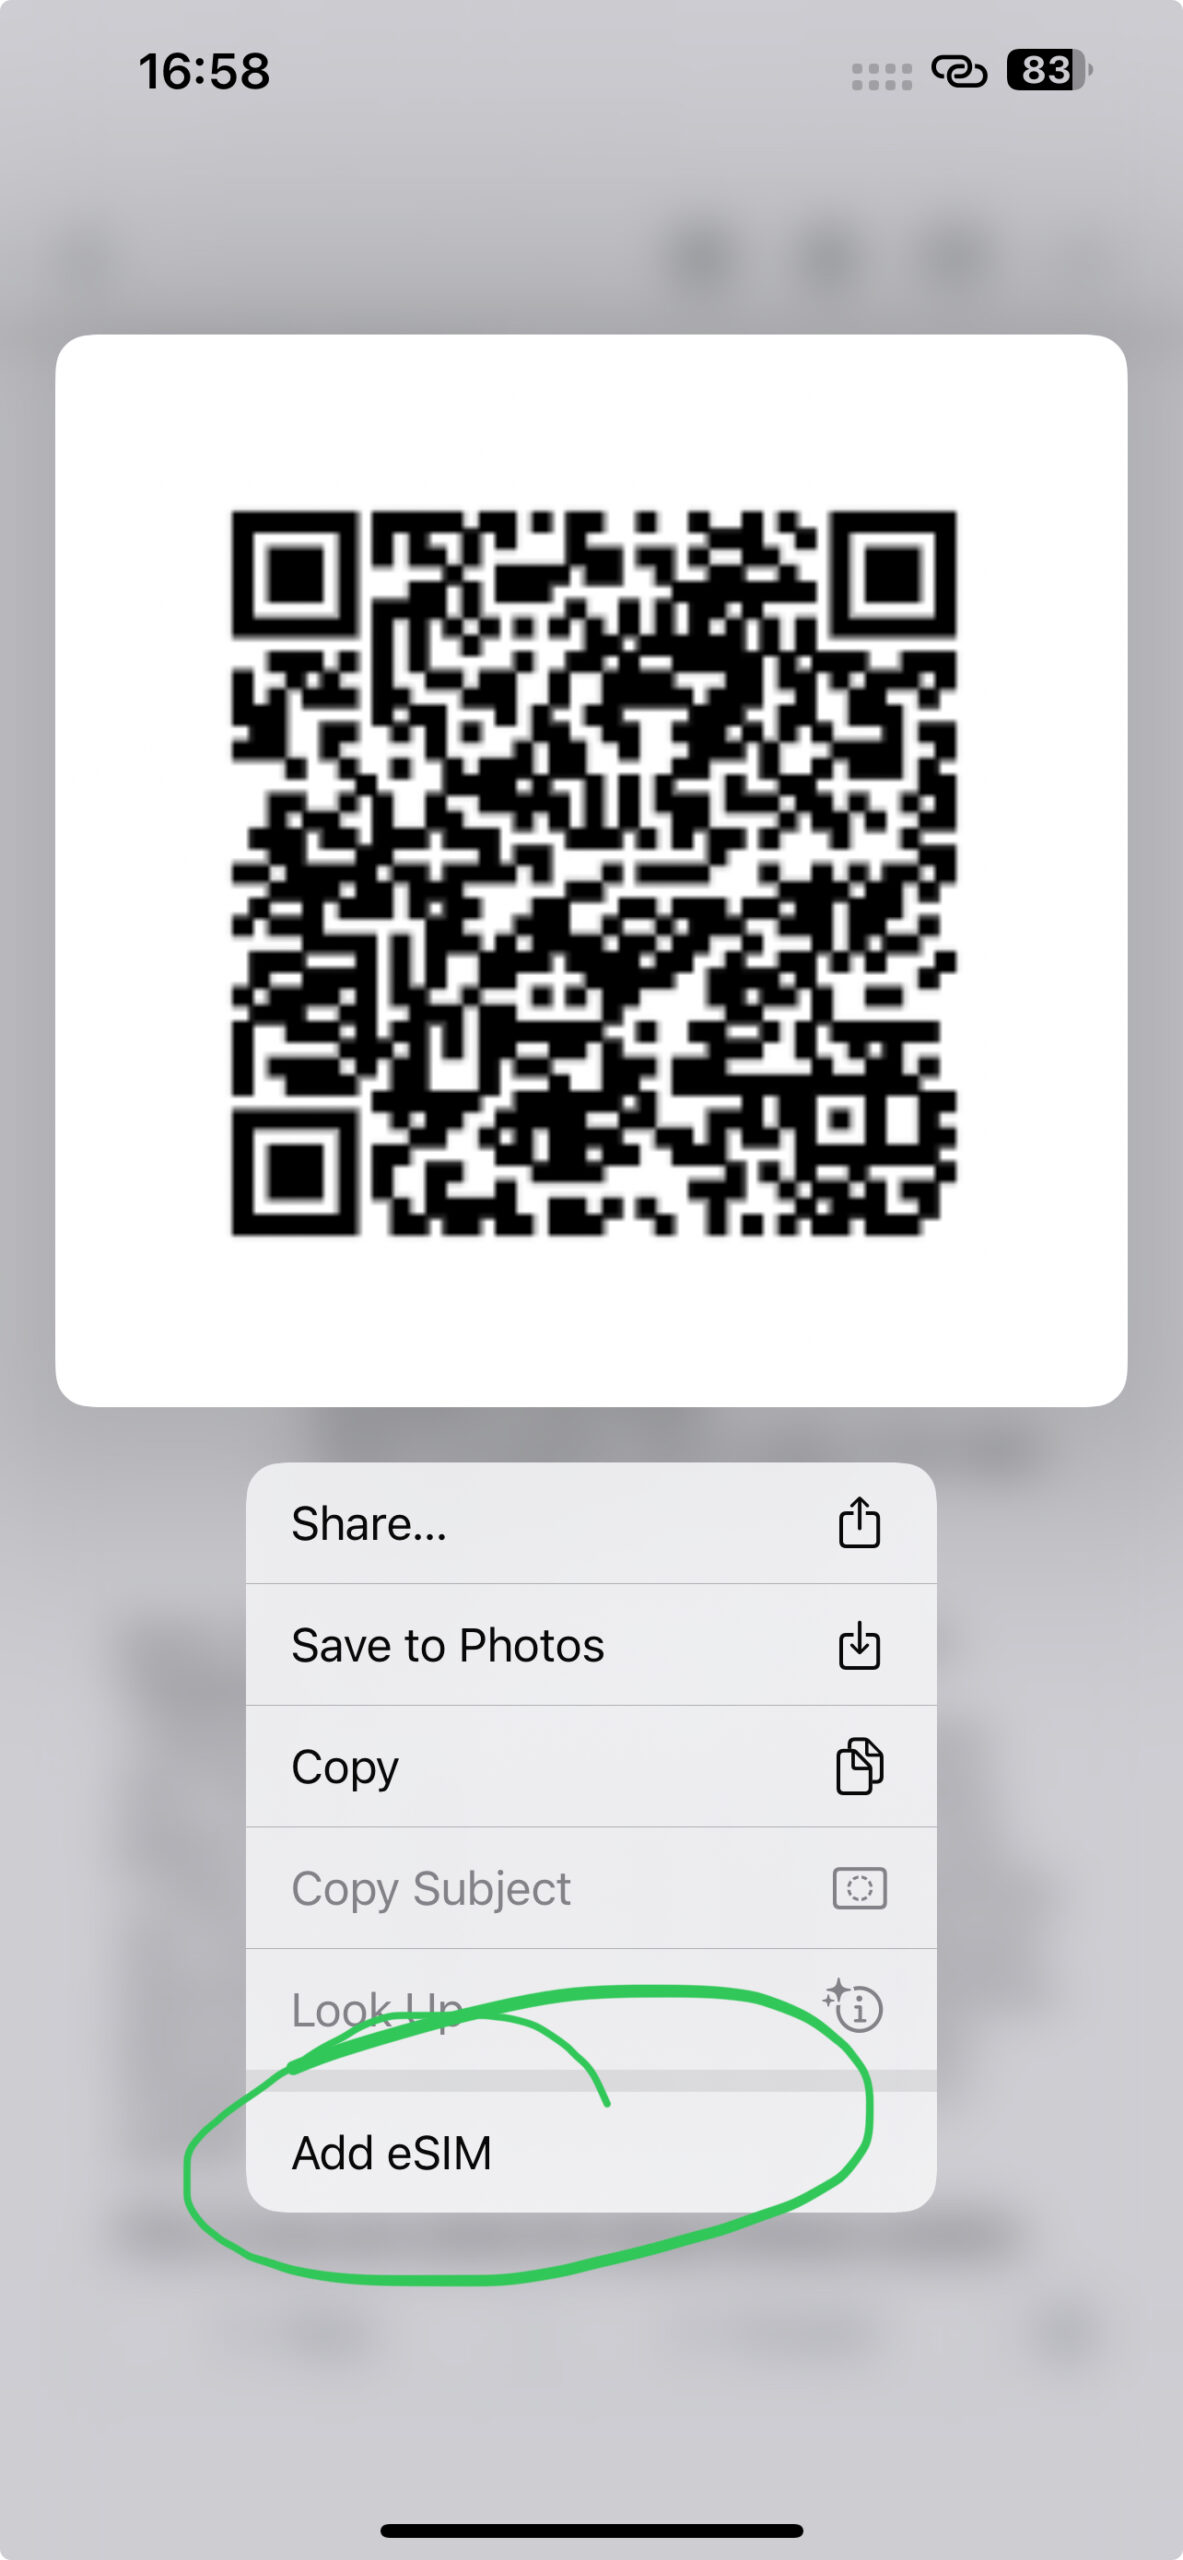
- Long Press the QR Code: Simply touch and hold (long press) the QR code image within the email.
- Select “Add eSIM”: A pop-up menu will appear. Choose the “Add eSIM” option from the list.
- Automatic Installation: Your phone will automatically detect and begin the process of adding the eSIM profile. Follow any on-screen prompts to confirm.
- Confirm & Label: Once added, you’ll be prompted to label your new eSIM (e.g., “Tripcel Travel,” “Mexico Data”). This helps you identify it later in your settings.
- Set as Primary for Data (Optional, but useful): Your phone might ask if you want to use the new eSIM for data. You can set it as your primary for data only when traveling, keeping your home number active for calls/texts.

Method 2: Quick Scan with QR Code
This method is perfect if you prefer scanning or if your device/email client doesn’t fully support the direct long-press method yet.
- Display QR Code on a Second Screen: Open the Tripcel eSIM email on another device (like a laptop, tablet, or a friend’s phone) or print the QR code.
- Open Your Phone Settings:
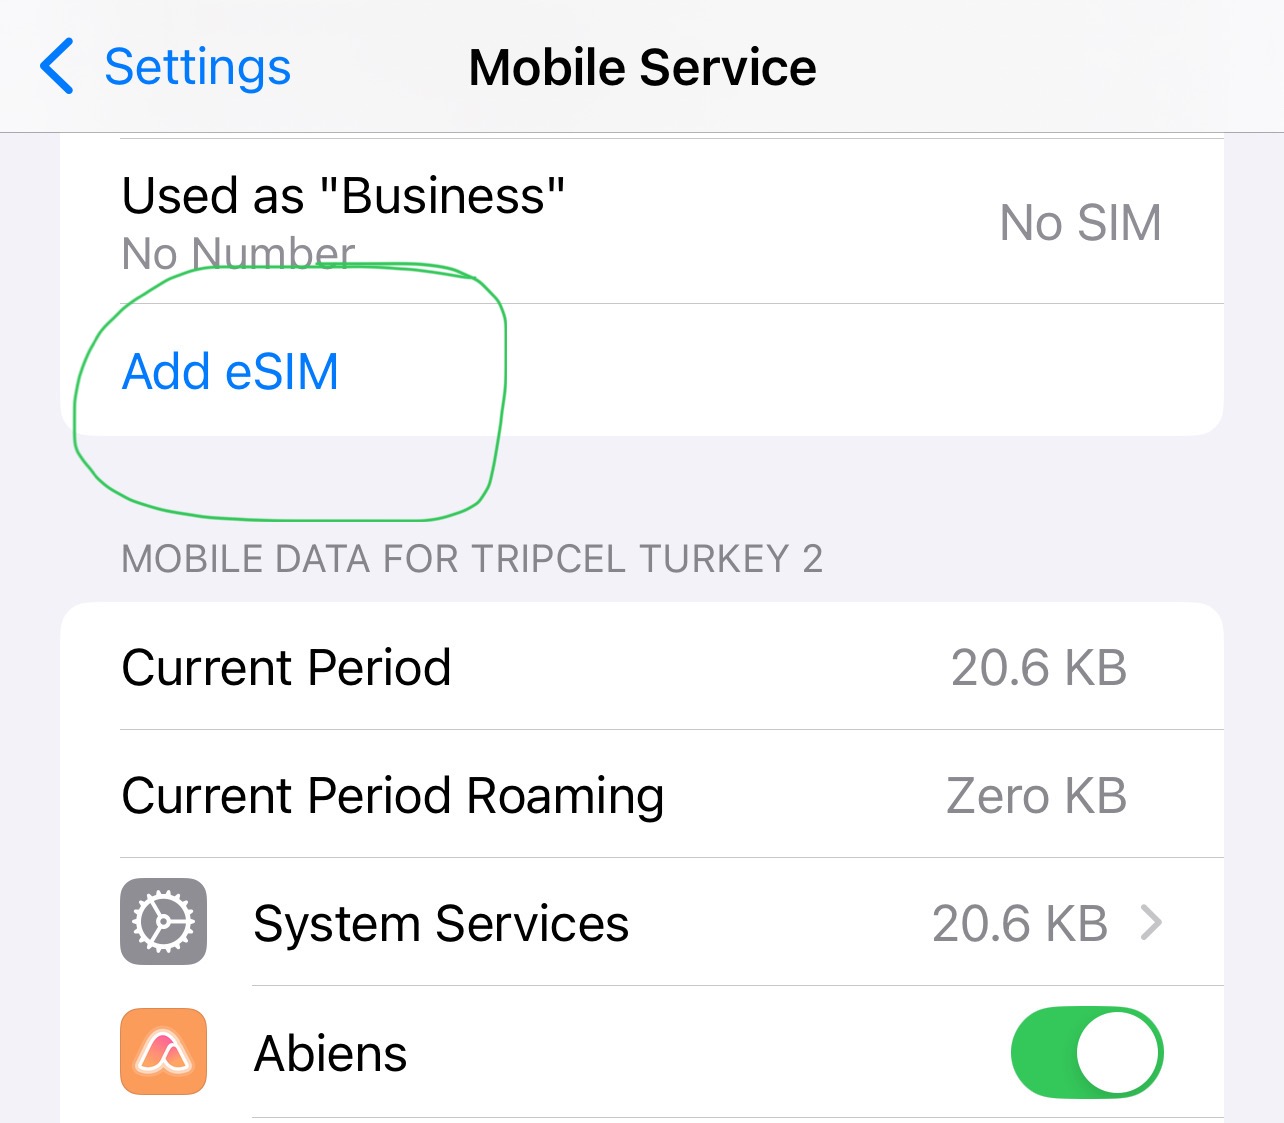
- For iPhones: Go to Settings > Cellular (or Mobile Data).
- For Androids: Go to Settings > Network & Internet > SIMs (or Mobile Network). Look for Add SIM or Download a SIM.
- Choose “Add eSIM” or “Download a SIM”: Tap this option.
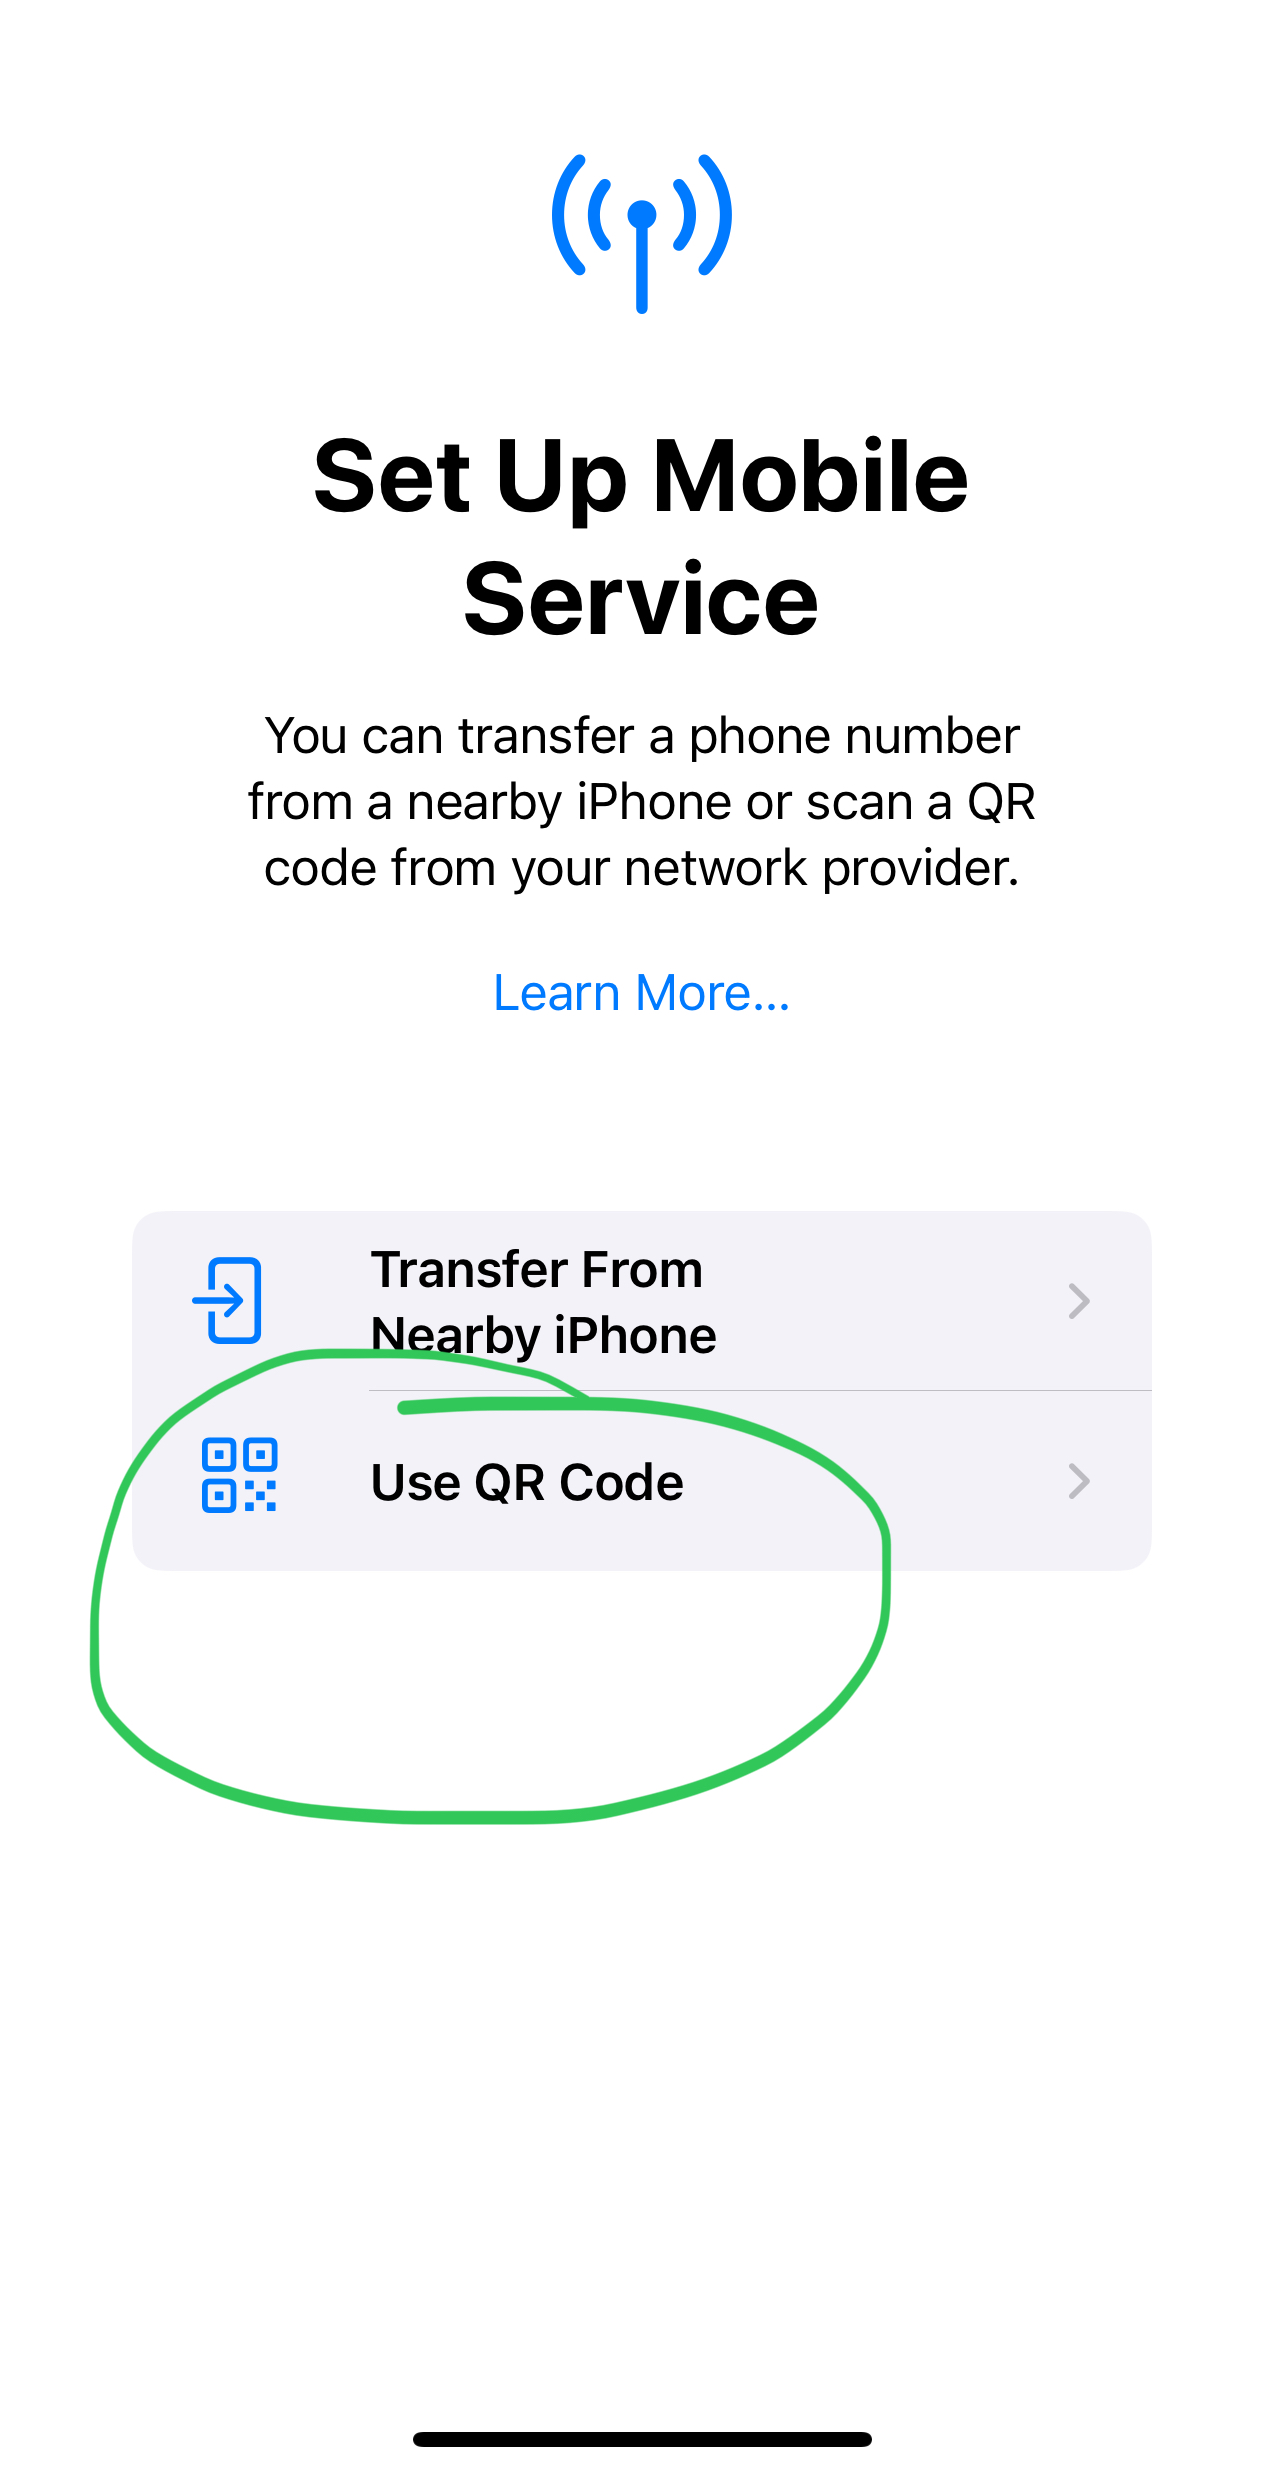
- Select “Use QR Code”: Your phone’s camera will open.
- Scan the Tripcel QR Code: Point your phone’s camera at the QR code displayed on your second screen.
- Confirm & Label: Your phone will detect the new plan. Confirm you want to add it, then label your new eSIM.
Method 3: Manual Input (For Any Scenario)
This method is always available if scanning isn’t possible or preferred.
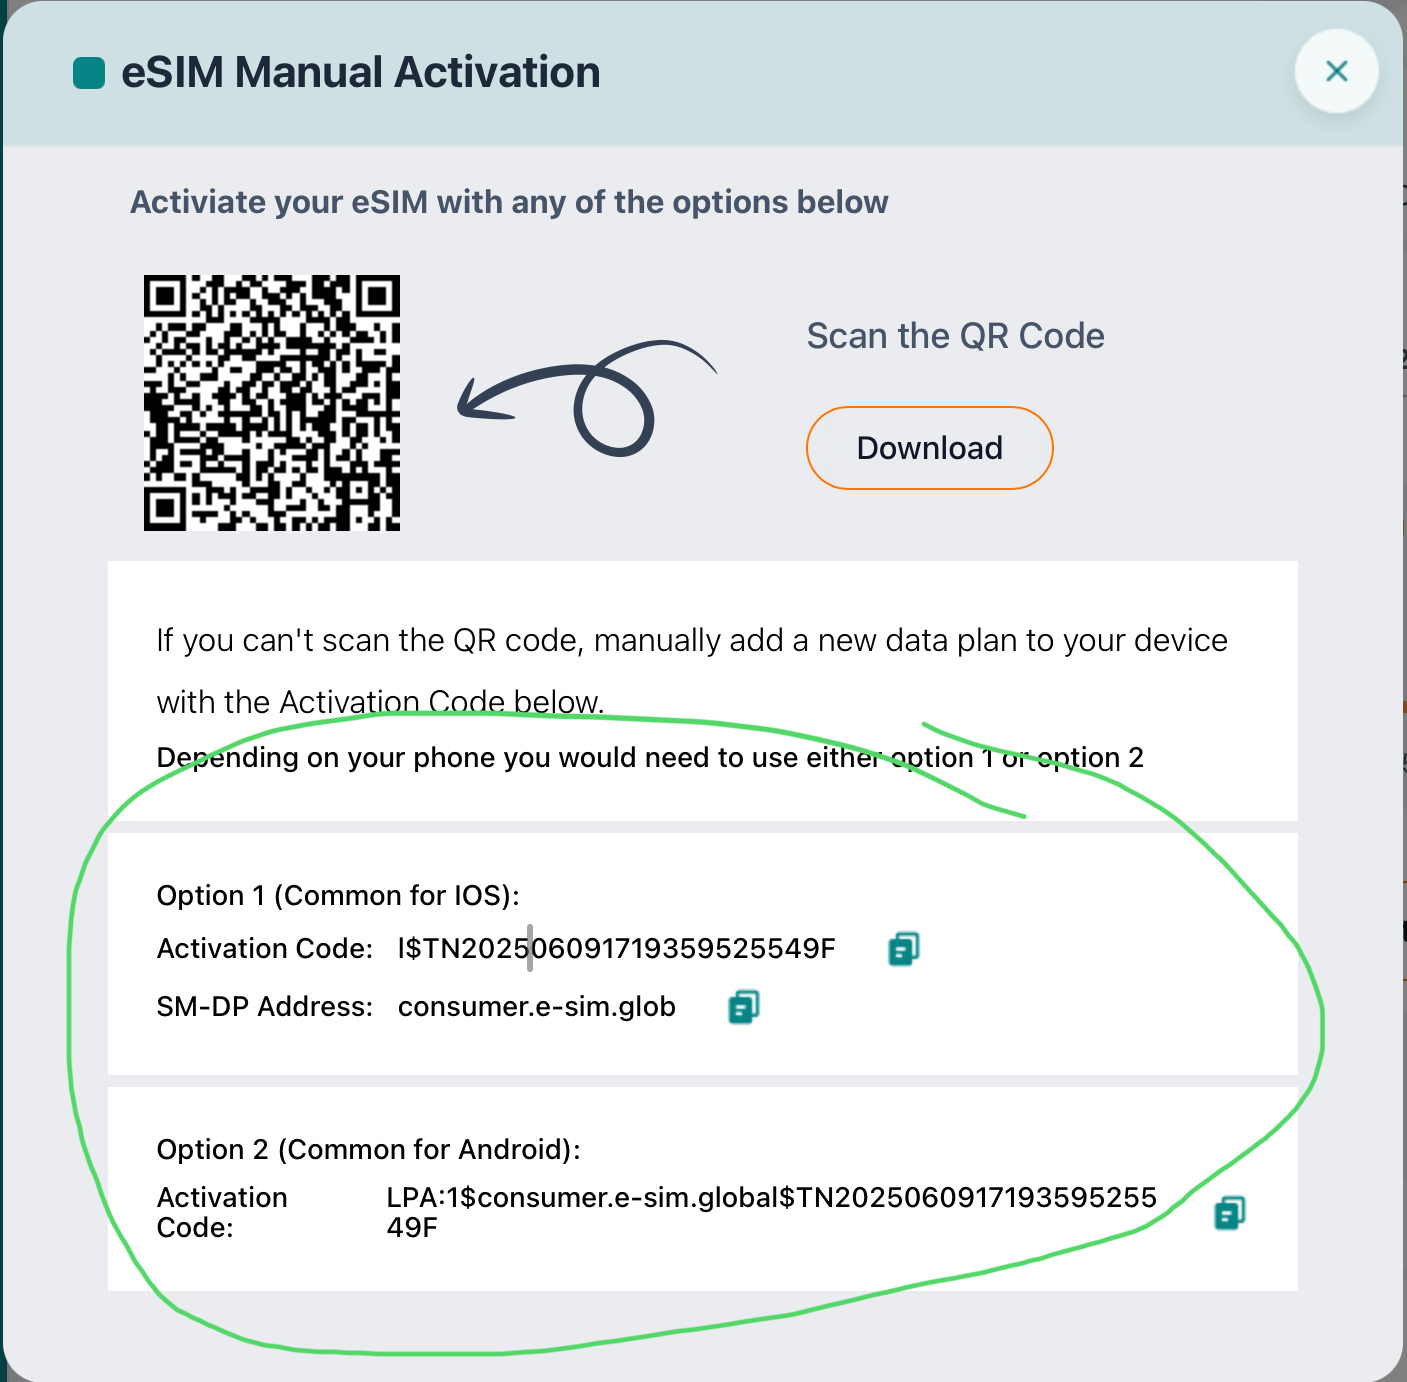
- Access Manual Details: In your Tripcel eSIM confirmation email, you’ll find specific manual activation codes (usually an SM-DP+ Address and an Activation Code).
- Navigate to Manual Entry: Follow steps 2-3 from Method 2, but instead of scanning, choose the “Enter Details Manually” option.
- Input the Details: Carefully type or paste the provided codes into the respective fields on your phone.
- Confirm & Label: As with the other methods, confirm the addition and label your new Tripcel eSIM.
Pro Tips for a Truly Stress-Free Installation:
- Install Before You Fly: The easiest way to avoid stress is to install your Tripcel eSIM before you leave your home country, while you have reliable Wi-Fi. The plan won’t activate until you land in your destination and connect to a supported network.
- Keep Your Home SIM Active (Until You Land): No need to remove your physical SIM. Your phone can run both simultaneously (Dual SIM). Just make sure your Tripcel eSIM is set for “data” when you arrive at your destination.
- Disable “Allow Cellular Data Switching”: On iPhones, if you have dual SIMs, go to Settings > Cellular(or Mobile Data) > Cellular Data and turn off “Allow Cellular Data Switching” if you only want to use your Tripcel eSIM for data. This prevents unexpected charges from your home SIM.
- Restart if Needed: Sometimes, a quick phone restart after installation can help the eSIM connect to the network smoothly.
Installing your Tripcel eSIM is a straightforward process designed to empower your travel. By leveraging our new direct install feature or following the other simple steps, you can eliminate connectivity worries and focus purely on the joy of discovery.
Ready for the simplest way to stay connected globally? Buy your Tripcel eSIM today and experience truly stress-free travel!


Leave a reply